
Bottling Your Brew - Bottle Time
Here are the steps I take and a basic description of why.

BULK PRIME
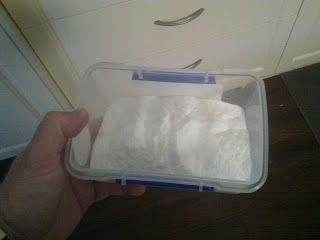
1. Measure out the right amount of sugar. I use 190g of dextrose for 23L of brew.
2. Add just enough boiling water to totally disolve the dextrose into CLEAR solution.
3. Add this to the bulk priming drum.
DECANT THE BREW INTO THE PRIMING DRUM
1. Simply open the tap! Make sure your second drum has the tap closed. Get the beer out of the fermenting drum without disturbing the sediment. Best to do this without moving the drum AT ALL. If you were clever when you put the beer down, you have it somewhere you can drain the beer off without moving it at all.

MIX THE DEXTROSE INTO THE BREW
1. Using the clean, sterile stirrer, stir the brew to ensure the dextrose is evenly mixed. Skipping this step will lead to gassing inconsistencies.
FILL BOTTLES
1. Fill slowly to prevent foaming.
2. Leave a good air gap at the top.
3. Cap as soon as you can, two people is ideal. On my own, I work in batches of six.
STORE IN A DARK PLACE
1. The yeast still has to work, so like before you want 22 - 27 degrees C.
2. Let it go for two weeks or so before moving to the fridge.
3. Try and leave it alone for four weeks so it matures. Six months is ideal, and there is a big difference in taste.
During storage, the waste will drop out of solution leaving a nice clean clear beer. The longer you leave the sediment undisturbed, the harder it will pack down and the easier pouring will be.

Decanting from brew drum to priming drum
BULK PRIME
1. Measure out the right amount of sugar. I use 190g of dextrose for 23L of brew.
2. Add just enough boiling water to totally disolve the dextrose into CLEAR solution.
3. Add this to the bulk priming drum.

190 grams dextrose for bulk priming
DECANT THE BREW INTO THE PRIMING DRUM
1. Simply open the tap! Make sure your second drum has the tap closed. Get the beer out of the fermenting drum without disturbing the sediment. Best to do this without moving the drum AT ALL. If you were clever when you put the beer down, you have it somewhere you can drain the beer off without moving it at all.

Sediment left in the brew drum. You don't want this stuff, so avoid moving the brew drum around.
MIX THE DEXTROSE INTO THE BREW
1. Using the clean, sterile stirrer, stir the brew to ensure the dextrose is evenly mixed. Skipping this step will lead to gassing inconsistencies.
FILL BOTTLES
1. Fill slowly to prevent foaming.
2. Leave a good air gap at the top.
3. Cap as soon as you can, two people is ideal. On my own, I work in batches of six.
STORE IN A DARK PLACE
1. The yeast still has to work, so like before you want 22 - 27 degrees C.
2. Let it go for two weeks or so before moving to the fridge.
3. Try and leave it alone for four weeks so it matures. Six months is ideal, and there is a big difference in taste.
During storage, the waste will drop out of solution leaving a nice clean clear beer. The longer you leave the sediment undisturbed, the harder it will pack down and the easier pouring will be.
Bottling Your Brew - Decision Time
Last week we put down a batch of beer. Time to bottle? There are a few simple decisions you should have already made by now. In this post, we quickly cover some pro's and con's...
First thing to decide is; 'Glass or PET?'.
GLASS
It's obvious, really... you buy beer from the shops and it's in glass bottles. You'd think the experts that bottle your commercial beer would use the best technology, right? But bottling in glass comes with it's own complications. You need crown caps, you need a cap press, you have to cap a lot of bottles and glass will smash (not good around swimming pools).
SOFTDRINK PLASTIC (PET) BOTTLES
It's recycling at it's finest. Mrs Six3seven drinks Coke Zero, so I have a constant supply of 1.25L PET bottles. Some say it's sacrilege, but soft drink bottles do have their advantages. Mainly, no special equipment required to cap them, you just screw on the lid. Each bottle is 1.25L, so you're handling less bottles. The 5 molded feet on the base has the unique advantage of packing the sediment better, making them better for travel (to parties!).
What do I do? A combination of both, I do two cartons (48 bottles) in glass with crown caps, and the rest, usually 4 or 5, into 1.25L plastic bottles.
HOW WILL YOU PRIME?
Last week we started the stage one fermentation, and made alcohol with some complex sugars for flavor and body. By now all the sugar has been consumed by the yeast so there is no more activity at the water seal. The yeast is still in there, which we need to use to make gas for carbonation, and we'll need to feed it... this is called priming and is done with dextrose. You need to prime just right, not enough and you'll have flat beer, too much and you'll have a whole bunch of grenades waiting to go BOOM! But will you prime individually, or bulk prime?
INDIVIDUAL PRIMING
You can buy a priming measure, and use it to put the right amount of sugar in each bottle. You can buy sugar tablets, already measure out for stubbies or long necks. If your sugar tablets are broken (which they will do in transit), you need to discard any that are inconsistent. Neither of these give you a lot of option when it comes to non-standard storage vessels.
BULK PRIMING
I'm lazy. I use 330ml stubbies and 1.25L soft drink bottles, so non-standard are the only vessels I use. And I'm lazy. So I bulk prime, because you measure out one batch of sugar just once. To bulk prime, you calculate the right amount of sugar based on the volume of beer, mix it in then just fill bottles, then cap. Easy. Downside is, you need a second drum to do your bulk priming in for reasons we'll discuss in the next post.
MARKING UP YOUR PRODUCT
There are plenty of options... paper labels, custom labels, marking bottle tops. My preference is to keep a 'Batch Diary', I list the recipe I used, dates, quantities, etc. Each batch is serial numbered, and I simply mark the bottle top with the number. No labels to remove between batches!!
Minor Restructure, and Another Blog
I didn't know what I wanted from this blog when I started it back in January. I think I was just blogging out of boredom. Once we were home from our flood-ruined holidays, I didn't touch the blog for 2 months.
Last month I posted a few nerdy linux and android related articles, and I just don't think they belong here. I still want to keep them though, so I've created another blog for all that boring stuff. This means this place can concentrate on the bikes and beer.
If you're here looking for the linux or android instructions I've written, you can find them at Six3SevenLinux.
Wikio top 30 motorcycle Blogs
I regularly visit Return of the Cafe Racers, one of many blogs I enjoy reading. I noted with interest he made 19th in the wikio top thirty motorcycle blogs. See his ROTCR post for more...


Bike EXIF took out top honors, a nice result since it was the only blog I voted for in the Best Australian Blogs competition. And it's Australian. And we all like seeing a good Aussie taking out a win.

Home Brew Beer - The Kit
I brew my own beer. The basic principle is a two stage process. First stage is unpressurised fermentation to produce alcohol, the second stage is pressurised fermentation to produce bubbles. The yeast culture consumes sugars in both stages to produce the desired result. The sugars you use will influence flavour and mouth feel.
I'm putting down a brew today, this is just the first stage (producing alcohol). This post will cover setting up your kit. A second post today will cover putting down your first batch. I will cover bottling (producing bubbles) in about a week.
Some people will say you need a $80 brew kit, Hydrometer, etc. These things add cost, and aren't really necessary. Here's the kit I put together...

1 x grommet for the seal $2 for a pack of 2 - supermarket or home brew shop
1 x long handled stirrer - supermarket or home brew shop (I was given mine)
1 x pull style tap $8ea - camping store (Bunnings didn't have these)
1 x 2L water jug (I just dug mine out of the back of the tupperware cupboard)
1 x tin opener (from the kitchen drawer)
1 x water kettle (from the kitchen bench)
Some bottles and caps (we'll talk about bottling options when we bottle)

All up you have spent about $30 and you have all you really need. I use second drum and tap for reasons I will explain when it comes time to bottle the beer, but you don't get these extra's in the $80 home brew kit. You can also buy a self adhesive bottle side thermometer for about $2 from your supermarket.
Using a jug of known capacity, measure out some graduations. I use 20L and 23L. Just use a nikko (sharpie) to mark the outside of the drum. You will need these marks to add the right quantities of water later.
And that's it! Now you're ready to put down you first batch of beer.
I'm putting down a brew today, this is just the first stage (producing alcohol). This post will cover setting up your kit. A second post today will cover putting down your first batch. I will cover bottling (producing bubbles) in about a week.
Some people will say you need a $80 brew kit, Hydrometer, etc. These things add cost, and aren't really necessary. Here's the kit I put together...

My kit
1 x water sealed vent $3 - supermarket or home brew shop1 x grommet for the seal $2 for a pack of 2 - supermarket or home brew shop
1 x long handled stirrer - supermarket or home brew shop (I was given mine)
1 x pull style tap $8ea - camping store (Bunnings didn't have these)
1 x 2L water jug (I just dug mine out of the back of the tupperware cupboard)
1 x tin opener (from the kitchen drawer)
1 x water kettle (from the kitchen bench)
Some bottles and caps (we'll talk about bottling options when we bottle)

Drum with water filled seal, drum without.
Using a jug of known capacity, measure out some graduations. I use 20L and 23L. Just use a nikko (sharpie) to mark the outside of the drum. You will need these marks to add the right quantities of water later.
And that's it! Now you're ready to put down you first batch of beer.
Home Brew Beer - Putting Down Your Brew
Now that you've got the kit, you'll want to make some beer!
You'll need some consumables. I'll list the stuff I use for a popular recipe I use.
1 x tin of Coopers brand Pale Ale malt extract
1kg of sugars - Homebrewers Warehouse 'Goodies Pack' (or Coopers 1kg Brew enhancer Nr. 2)
1 x 450g jar of no name honey
1 x jar of sterilizer (you'll get several cleans out of 1 jar)
2L of ice cubes
I buy all this stuff from Homebrewers Warehouse, they give out free replacement yeast that works better for tropics, their prices are cheaper than the supermarket, and they are just nice guys.
Putting down a brew only takes a few minutes once you're organised and know what you are doing.


STERILIZE EVERYTHING. Really, everything. If you keep everything super clean your brew won't get infected. Do this just before you brew by following the instructions on the sterilizer you bought, the sterilizing solution will get on your hands and ensure you don't infect the brew with your hands. Rinse everything really well. Sterilizer will give your brew a nasty flavour if you don't rinse properly.
MAKE SURE YOU CLOSE THE TAP!
MAKE SURE YOU CLOSE THE TAP!
PREPARE YOUR WORKSPACE. Prepare a workspace where you have access to water, I do it outside near a tap with a hose. Open the tin of malt extract and jar of honey. Boil up some water in your kettle and measure out your 2L.
ADD CONSUMABLES. Pour the malt extract and honey into the drum. Pour about 1L boiling water into the empty malt extract tin and the remaining boiling water into the drum. Carefully, using a towel or oven mitt, pour the water from the malt extract tin into the drum. Doing it this way gets as much of the malt extract out of the tin and into your brew. Add the sugars (Goodies Bag or brew enhancer Nr. 2). Mix gently until all the lumps are gone.
ADD WATER/ICE TO 20L. For the water temperature out of the tap here, I've done some math and figured out that for 2L boiling water, I add 2L of ice cubes and fill to the 20L mark. This gets me right into the middle of the 21 - 27 degrees for adding the yeast. I worked it out by making the assumption that 2L of boiling water close to 100 degrees, plus ice at 0 degrees would give me 4L @ ~50 degrees. Water out of the tap here is 18 - 22 degrees. 16L @ 20 degrees + 4L @ 50 degrees will give a final temp of about 26 degrees. In reality, some temperature is taken out by the 1.25L of malt extract and the 1kg of sugar so I'm pretty happy with the math. Plus I tried it many times and it works fine.
ADD YEAST. After you've added the tap water to the 20L mark there will be foam on top. For this reason, we mix the yeast into a little under 2L of water. When you pour the yeast water into the drum, it will pour through the foam. If you just sprinkle the yeast on top, it just sits on the foam.
TOP UP TO 23L. Using tap water.
PUT THE LID ON. Using the water filled environment seal in the lid, put the lid on and seal it up tight.
WAIT. About 7 days or so. Best to store your brew somewhere out of the sun, where it will sit between 20 - 30 degrees. I store mine in an old, very large esky. You will know it's finished when the water seal stops bubbling. I check mine before and after work each day.
Subscribe to:
Posts (Atom)