Pocket Hand Chainsaw
While I'm not sure how long one of these Pocket Chainsaws will stay sharp, for under $40 it'll get you out of a pinch...
Music Tags
Music Tags
I'm hopeless... that is to say my memory sucks big time. No matter how much I love something, I often forget about plans. That's been happening a lot with music, stuff I want to buy, artists I want to learn more about. Enter Shazam... I've been tagging music simply as a way to quickly create a record of music I like.
I figured it might be time to start sharing those tags...
I figured it might be time to start sharing those tags...
Gear...
Vitesse Hunt boots:


These boots look like a nice alternative to the black boy-racer come power ranger boots I normally wear. Lace up style should end up with a better fit, and all my non-riding boots are brown anyway.
I have a pretty wide foot, and the Vitesse site says:


These boots look like a nice alternative to the black boy-racer come power ranger boots I normally wear. Lace up style should end up with a better fit, and all my non-riding boots are brown anyway.
I have a pretty wide foot, and the Vitesse site says:
Inspired by traditional work boots, The Hunt employs laces to offer a snug and variable fit. Its upper is entirely made out of premium American saddle leather, for durability and comfort. It will take wax to a shine and patina beautifully through years of loyal use.So I wonder just how much room there will be. Typically, I end up buying a size too large to accomodate my flipper-feet.
Its fit is regular in width, but offers the highest forefoot of all 3 models, so that your toes have a bit of extra room.
Available in full size 39–47. Price starts at 175 Euros.


Motorcycle Ergonomics - Pictorially
Cycle-ergo is a really nice, interactive ergonomics simulator... I'm not sure who made the webpage, or why they made it, but it's a really nice tool.
You can input more than one machine, and use the mouse scroll wheel to fade between bikes to see the real differences.
I set up three bikes, a stock 2010 R1, my 2010 R1 with 7cm up and 1cm back bars, and the old 2006 FZ1 to get a real idea of where my new bike puts me... and it really is a good compromise between the two.

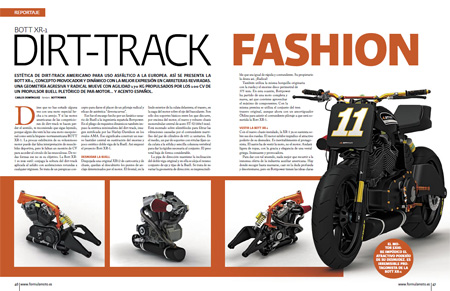
BOTT XR-1, work in progress
The guys over a Bottpower are making progress... this thing is looking amazing.


Check out the renders...


LSL Clipons - Detail Pics
Sadly, I'm still using the phone as a camera and it's really starting to bug me. Anyway, here are some more photos of the clipons installed.


Clutch side cable routing

Horn cable routing

Brake side throttle cable routing

Red/White 2008 with standard clipons Vs.
Blue/White 2010 with LSL Tourmatch clipons

Brake line and cable routing

Brake line routing

I installed the master cylinder resevour different to the instructions;
they had it right in front of the speedo


From the Townsville 400 Today
This is the best photo I took all day...

I didn't take many photo's since I was just using my phone and they generally turn out crap. Besides that, the action on track is almost impossible to capture through the safety fences, I wasted a lot of time last year trying...
We had a fantastic day, though I am knackered now.
Removing the OEM R1 Clipons
This isn't going to be a detailed tutorial, you'll need to support the front end of the bike, which means a specialist stand. If you have one, chances are you've done work like this before.
1. Support the rear of the bike on a paddock stand, support the front on a steering stem paddock stand.
2. Remove the clutch-side grip. Here's a tip for dealing with the OEM grip glue:


3. Loosen everything off; clipons, brake/clutch levers, brake reservoir, etc.
4. Loosen fork clamps; bottom first, steering damper mount required loosening also, then the top ones.
5. Drag the forks down far enough to remove clipons.
6. Slide the clipons out of the switch gear.
Now you're ready to install the new clipons.
1. Support the rear of the bike on a paddock stand, support the front on a steering stem paddock stand.
2. Remove the clutch-side grip. Here's a tip for dealing with the OEM grip glue:

Use a wire coat hanger, bend it like this

Trim one end like this

Keeping the long edge of the sharp tip against the bar, insert it between the grip and bar.
Don't worry if you can get it all the way in, just use the crank handle and wind it around.
It might take a couple of laps, but eventually you'll have split the glue and can slide the grip off.
3. Loosen everything off; clipons, brake/clutch levers, brake reservoir, etc.
4. Loosen fork clamps; bottom first, steering damper mount required loosening also, then the top ones.
5. Drag the forks down far enough to remove clipons.
6. Slide the clipons out of the switch gear.
Now you're ready to install the new clipons.
Today's Mail

Evotech Performance Fender Eliminator

LSL Tourmatch Clipons

Comparison between Yamaha's OEM R1 and LSL Tourmatch clipons.
Quite a difference!
To change the clipons you need to drop the forks out, which I managed to get done this afternoon, inserted the new clipons and buttoned the triple clamps back up, the bike is back on the ground. On the weekend I'll strip off the OEM rubber brake lines and punch the holes for the switch gear... it's going to be a fiddly job to line everything up, but I can't wait to ride it!
Husqvarna Nuda 900cc Promo Video
900cc parallel twin motard. Unlike the KTM, Aprillia and Ducati offerings, the parallel twin engine keeps the layout closer to the traditional thumper single cylinder motards.
Based on the BMW 800cc powerplant, the 900cc Husky is the first bike in a while I've really boon looking forward to it's release date.
DIY Air Intake System (AIS) Block Off Install
We've all seen those really cool AIS block off plates, and they're not that expensive or difficult to install. Why do we need them? Some will say weight, but they weigh naff all so I call that a wank. I fitted them to the FZ1, and immediately that annoying popping on deceleration was completely gone. It's no surprise that the R1 with the GYTR pipes is popping and carrying on like the guns of Navarone.

Time to fix all that popping. But I couldn't be bothered waiting days (more like weeks) for the parts to turn up... and I had some stuff in the shed I figure I can achieve the same result.
This is all you'll need:


1. Lift the tank; remove the rider seat, remove the two phillips screws retaining the dress panels, slide panels forward to release them. There is no need for force. Remove the 5mm front tank bolt just behind the head stem, remove the two 5mm hex head bolts from the side of the tank. Lift the tank and support however you prefer. Fanatics might like to completely remove the tank. Damn fanatics.


Yamaha's AIS - pumps fresh air into the exhaust to cheat CO emissions testing
Time to fix all that popping. But I couldn't be bothered waiting days (more like weeks) for the parts to turn up... and I had some stuff in the shed I figure I can achieve the same result.
This is all you'll need:

Pliers, #2 Phillips, flat blade, stumpy flat, 5mm hex key,
1/2" carby bungs (x3), stainless steal hose clamps (x3), zippy tie
As always, you'll need a rag (not shown)

The three 1/2" carby bungs

Tank side bolt under dress panel

Lifted tank supported on a rod
2. Disconnect the fuel line to the airbox; pull up the orange sleeve, pinch the blue buttons, gently remove the fuel line, there is no need for force it should disconnect easily. Catch fuel dribbles with a rag.
3. Disconnect the injector loom; follow it down to adjacent to the chassis. Again, no force needed, just a gentle press of the clip and the connector should come apart easily.
4. Remove the phillips screws, remove airbox lid.
5. Disconnect the upper velocity stacks; the plastic control arms attach with a 'C' shaped cross section and you can gently pop these apart. Remove both the upper and lower control arms to allow complete removal of the upper velocity stacks. Disconnect the servo push rod (with the white block) is the same fashion.

Upper velocity stacks removed
6. Remove the six hex head bolts retaining the lower velocity stacks.
7. Remove the lower airbox; as you lift it out, you'll need to trace the servo motor loom and disconnect it. You'll also need to disconnect the two 1/2" air hoses (one at the rear, one on the throttle side), and gently persuade the air intake duct to disconnect.

Removing the airbox lower - Throttle side air hose

Removing the airbox lower - Servo motor loom
8. Remove the airbox intake funnel; disconnect the blue connector attached to the sensor, and slide the opaque connector off it's retainer. Extract the intake funnel from the intake boots; the intake boots from each side intake tube feed inside the intake funnel. They are pretty flexible, so a little wiggling is in order. There is a grey plastic nipple in the middle of the funnel, surrounded by a rubber grommet... apply pressure to the nipple as you extract the funnel.

Blue connector disconnected, opaque connector removed from it's retainer

Intake funnel.
Note the grey nipple-like thing and grommet in the middle; press here!
9. Remove the AIS motor and associated hoses; pretty easy and shouldn't really need explaining.

AIS about to be removed!
10. Fit the 1/2" carby bungs to the AIS intake ports; secure with stainless steel hose clamps. Don't over tighten, just make them secure.

Carby bungs fitted to AIS ports and secured with hose clamps
11. Zippy tie the opaque AIS loom connector; to the adjacent loom to ensure it doesn't interfere with the radiator fan.
12. Fit the 1/2" carby bung to the throttle side airbox lower AIS port.
13. Assembly is the reversal of the procedure above! You should have fitted just the rear air hose to the airbox lower.
Now when you close off the throttle on deceleration, Vietnam veterans won't have flashbacks!
UPDATE: More photos and description of an AIS block off plate installation on the R1 forum. You might need to be logged in to see the pics, though.

New R1 Parts - LSL Tour Match (150Y120)
The R1 is a massive technological improvement over the FZ1N, the engine drive out of turns is fantastic, gearbox is smooth, dash computer functionality is comprehensive, and the fairing offers protection on the highway... but one thing I don't like is the feeling that I am hanging onto the front axle.
So I've ordered a set of LSL Tourmatch clip-ons. These are made model specific and come as a complete bolt-on solution.

UPDATE 7th July 2011: Install has begun! Related posts here...
These new clip-ons will raise my wrists 70mm up and bring me 10mm back, I figure they should be good enough for a three inch improvement at the shoulders.
They are a complete kit, and as far as I can tell come with a braided front brake line to accommodate the extra lift at the brake master, and 6mm spacers to lift the fairing to make room at full steering lock.
You can find LSL's clip-on range for your model in this embedded webpage (from their website).
Bottpower XR-1
I've been keeping a weather eye on the Bottpower blog as they develop this little number... the XR-1.
 Other projects they are working on:


M210 Moto2 bike

Morlaco (CBR 954 based)
Obviously they have some chassis building, bike credibility... but the real interest for me is the XR-1, a Buell XBS/R based flat track/street tracker concept. Given the 1200 Buell XB engine's torque delivery, it should make for a fun ride.
Should be an interesting project...
Subscribe to:
Posts (Atom)